The base vehicle ( Mercedes 1017A) is 24 volt and has two 80 Amp batteries in parallel to start and run the vehicles electrical systems. The original vehicle alternator was 55amp, I have however uprated this to 100 amp at 24 volt. The vehicle itself has minimal electrics due to its age and does not have anything that remotely resembles modern technology.
During the planning stages it was my intention to keep everything in 24 volts, as on paper it all made sense as the base vehicle is 24 volt. However, in reality we soon found that it was very difficult to source the finer parts such as good quality light fittings etc in 24 volt so we adapted and have both 24 and 12 volt systems in the cabin as well as 220v power.
There are many fantastic systems available and your choice will depend on your budget and requirements. For two years running we went to the Dusseldorf Motor Caravan show as it has one hall that is dedicated to manufactures of parts. We looked at, and spoke to, companies such as Victron, and Mastervolt . Both these companies make fantastic products and were very helpful. We also looked at UK companies such as Sterling and Antares. We loved the superior quality of Victron and Mastervolt but sadly couldn't afford their prices. In the end we opted to mix and match our system using components from different companies.


The batteries are 4x Sonnenschein GF 12 105V Gel batteries with a rating of 120 Amp . They are mounted securely under the right hand seat locker inside the vehicle . Each pair are connected in series then the two pairs are parallelled to give an output of 240 amp at 24 volt. Buying the right batteries is both very important and very confusing. Different manufactures rate them in different ways. This makes it very hard to do comparisons . We also found that some batteries only have a small usable capacity so its larger amp/hour rating was a useless figure if you could only use 10% of its capacity before the voltage dropped too low. I have tested these down to 50 % and they were still producing over 26v . Lead acid batteries can give a bigger capacity for your money but we opted for Gel as you don't need to vent them and we are lazy when it comes to maintenance . Vehicle roll on rough terrain should not bother them. The downside of these batteries is that they weigh over 40KG each so 4 of them is heavier than a good motorcycle.
3 x Solar panels on the roof mounted on aluminium angle with Sikaflex 252.
The control panel that monitors all the systems is in a shallow cupboard over the cabin door .
Here is a list of the components we opted for
The mains Battery Charger is made by Xantrex and is their True Charge 30 amp 24 volt charger with a remote Monitoring panel and battery temperature sensor.
This charger is capable of charging several battery banks and can work in the following range
90 – 265v
47 – 63 HZ
This was one of the few truly world wide chargers I could find within my price range .
.jpg "Xantrex TruCharge2 20-24")
.jpg "Xantrex Charger Remote Panel")
The Solar Charger is also American and is a Morningstar Tristar MPPT 60 Amp charger . We purposely looked for charger that had a large heat sink attached and had no fans that could generate noise.
This charger can also serve several battery banks at the same time . It has a battery temperature sensor.

.jpg "Morningstar Remote Panel")
So far this device has been very impressive and once set up can be left alone. It also has a remote control panel with diagnostics.
Although both the solar charger and the mains Xantrex charger have the capability of simultaneously charging several batter banks it soon became apparent that connecting the vehicle starter battery to the charging circuit wasn't an option.
Although the chargers have several outputs you can only set one charging algorithm across all of them. In my case both the chargers were set to charge the habitation batteries which were Gel.
Gel battery charge at different voltage levels to the flooded lead acid batteries used for starting .
The float charge stage for the Gel batteries was too high for the lead acid and would have fried them in no time .
If I set the output to Lead acid then the chargers would also do an automatic equalisation charge at a preset period .( 28 days default ) This would destroy the Gel Batteries .
I did want to ensure that the starter batteries were always in good condition and benefited from the excess power from the solar panels. The solution was a small trickle charger that connects between the two battery banks.
The device I opted for was A Sterling 24v to 24v Battery maintainer
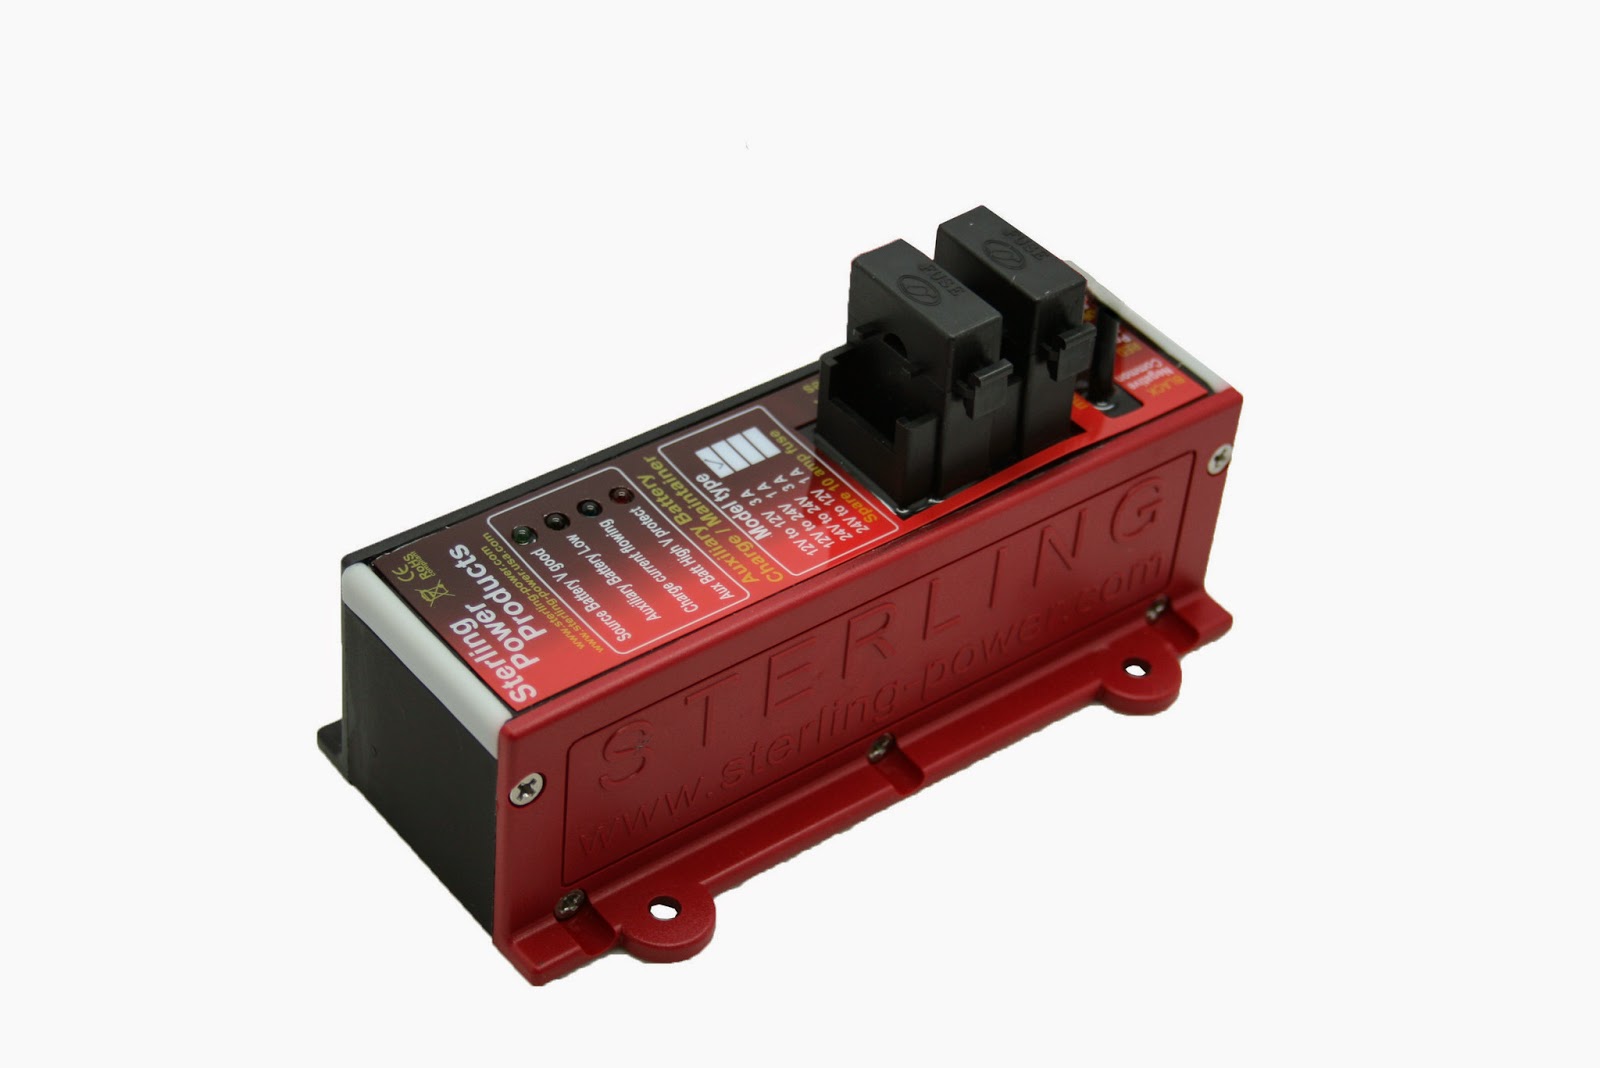
This small device monitors the Starter batteries and if the fall below a certain voltage it diverts 1.5 amp at about 27 volts over to the starter until it is full again.
In every day use this device will hardly be needed as driving the vehicle on a regular basis is sufficient to keep the battery levels up. It will however pay dividends when the vehicle is stationary for long periods or in storage.
This difference in charging voltages also highlighted that the output from the vehicles alternator would also be insufficient to give the Cabin Gel batteries a decent charge. To combat this issue I connected the two battery banks via a Sterling 30 amp 24v- 24v Battery to Battery charger

This device Monitors the starter batteries and when their voltage reaches a certain level ( ie they are full and being charged from the alternator ) then it will send a maximum of 30 amps over to the habitation batteries. More importantly the charge going over the habitation batteries can be set for the right levels for Gel ( or most other types of battery ) This charger will break the connection when it no longer detects an alternator input.
This backwards and forwards flow of charging appears complex but it does work. When the engine is running both battery banks are maintained correctly and when the engine isn't running the starter battery are kept fully charged from the cabin batteries and the cabin batteries are topped up by the solar or mains chargers.
Both these chargers have been mounted on the cabin wall at the rear of the batteries under the bench seat. This area is well ventilated.


In one field trial I boiled two electric kettles, a further 15 litres in the calorifier to 80 degrees and cooked a full roast dinner in a electric oven via an inverter. The panels had the batteries back to 100% on an overcast day within 2 hours.

I think Heating the water in the calorifier , running the Eberspacher heating and the fridge via the solar each day is mostly achievable .
The inverter is from the German company Votronic . I have found their quality to be excellent. I bought all of my Votronic items directly from them.

Its model is the Votronic SMI 1800 ST-NVS/24v
This quite a clever piece of kit and works brilliantly.
Unlike other inverters, the power from your electric hook up goes via it. If the inverter detects you have 220v coming in then it doesn't wake up and the power passes directly through it and onto you appliances and sockets . If however it detects no AC input then it is manually activated to provide power on demand to your outlets . It is protected by two RCB’s on either side of it. Its output is pure sine Wave and runs continuously at 1800 watts and at 2500 for short periods and will peak at 3600 watts.
At rest its consumption is negligible.
We are not big consumers of power and have nothing in the vehicle that runs at more than 800 watts so this is more than sufficient.
The 12 volt demand for lighting etc is provided by a Votronic DCDC 2412-45. This converts 24v to 12v and has a maximum load of 45 amps. It is mounted in the garage panel and has a remote switch on the interior control panel that shuts it down. This gives me the ability to turn off all the 12v systems with one switch as I leave the vehicle . The heating and fridge are 24v and will not be effected by this switch .
The control panel, which is situated above the door of the cabin is a combination of remote panels from the chargers and other monitoring displays and switches


The battery monitor is a Votronic LCD Battery Computer S . It can be connected to two battery banks and monitors current and voltage . It quickly indicates the batteries condition / state of charge and remaining capacity .
The current is measured via a Votronic Shunt which is part of the package


The problem with these displays is that you cant keep your eyes off them . Sadly every time the sun comes out you have to look at its charging rate.
The refrigerator and heating system run on 24 volts .
The lighting is all 12 volt and either controlled from switches built into the fittings or bank switches on the control panel.
The position of the lights was decided prior to the roof panel being made as I wanted all the wires to be layed within the panel to give a nice wire free clear ceiling .
The main light over the table and the reading lamps in the living area and bedroom were supplied by a German company called Lumicoin

.jpg "Lumicoin Dimmable Reading Lamp on Stalk")
.jpg "Lumicoin Dimmable Reding Lamp")
They are all LED and Dimmable .
Other ceiling lamps were provided by Frilight and are also dimmable via a dial in the Control Panel.
I have also used strips of LED’s for areas such as Garage lighting, Step area, over the kitchen worktop and the bathroom .
The outside light above the door is a Labcraft Astro LED Lamp.